Wednesday, June 11, 2025

πŸŽ‰ New FREE SVG Alert from Tinks Treasurez!

πŸŽ‰ New FREE SVG Alert from Tinks Treasurez!

By Angie Koehne | Tinks Treasurez

Hi crafty friends! πŸ’–
I’m so excited to share something special with you today 6/11/2025— a brand-new FREE SVG is now available from Tinks Treasurez! Whether you're a card maker, scrapbooker, or Cricut crafter, you're going to love this exclusive digital design.  I will be adding a new file each Wednesday.  Remember to check back!

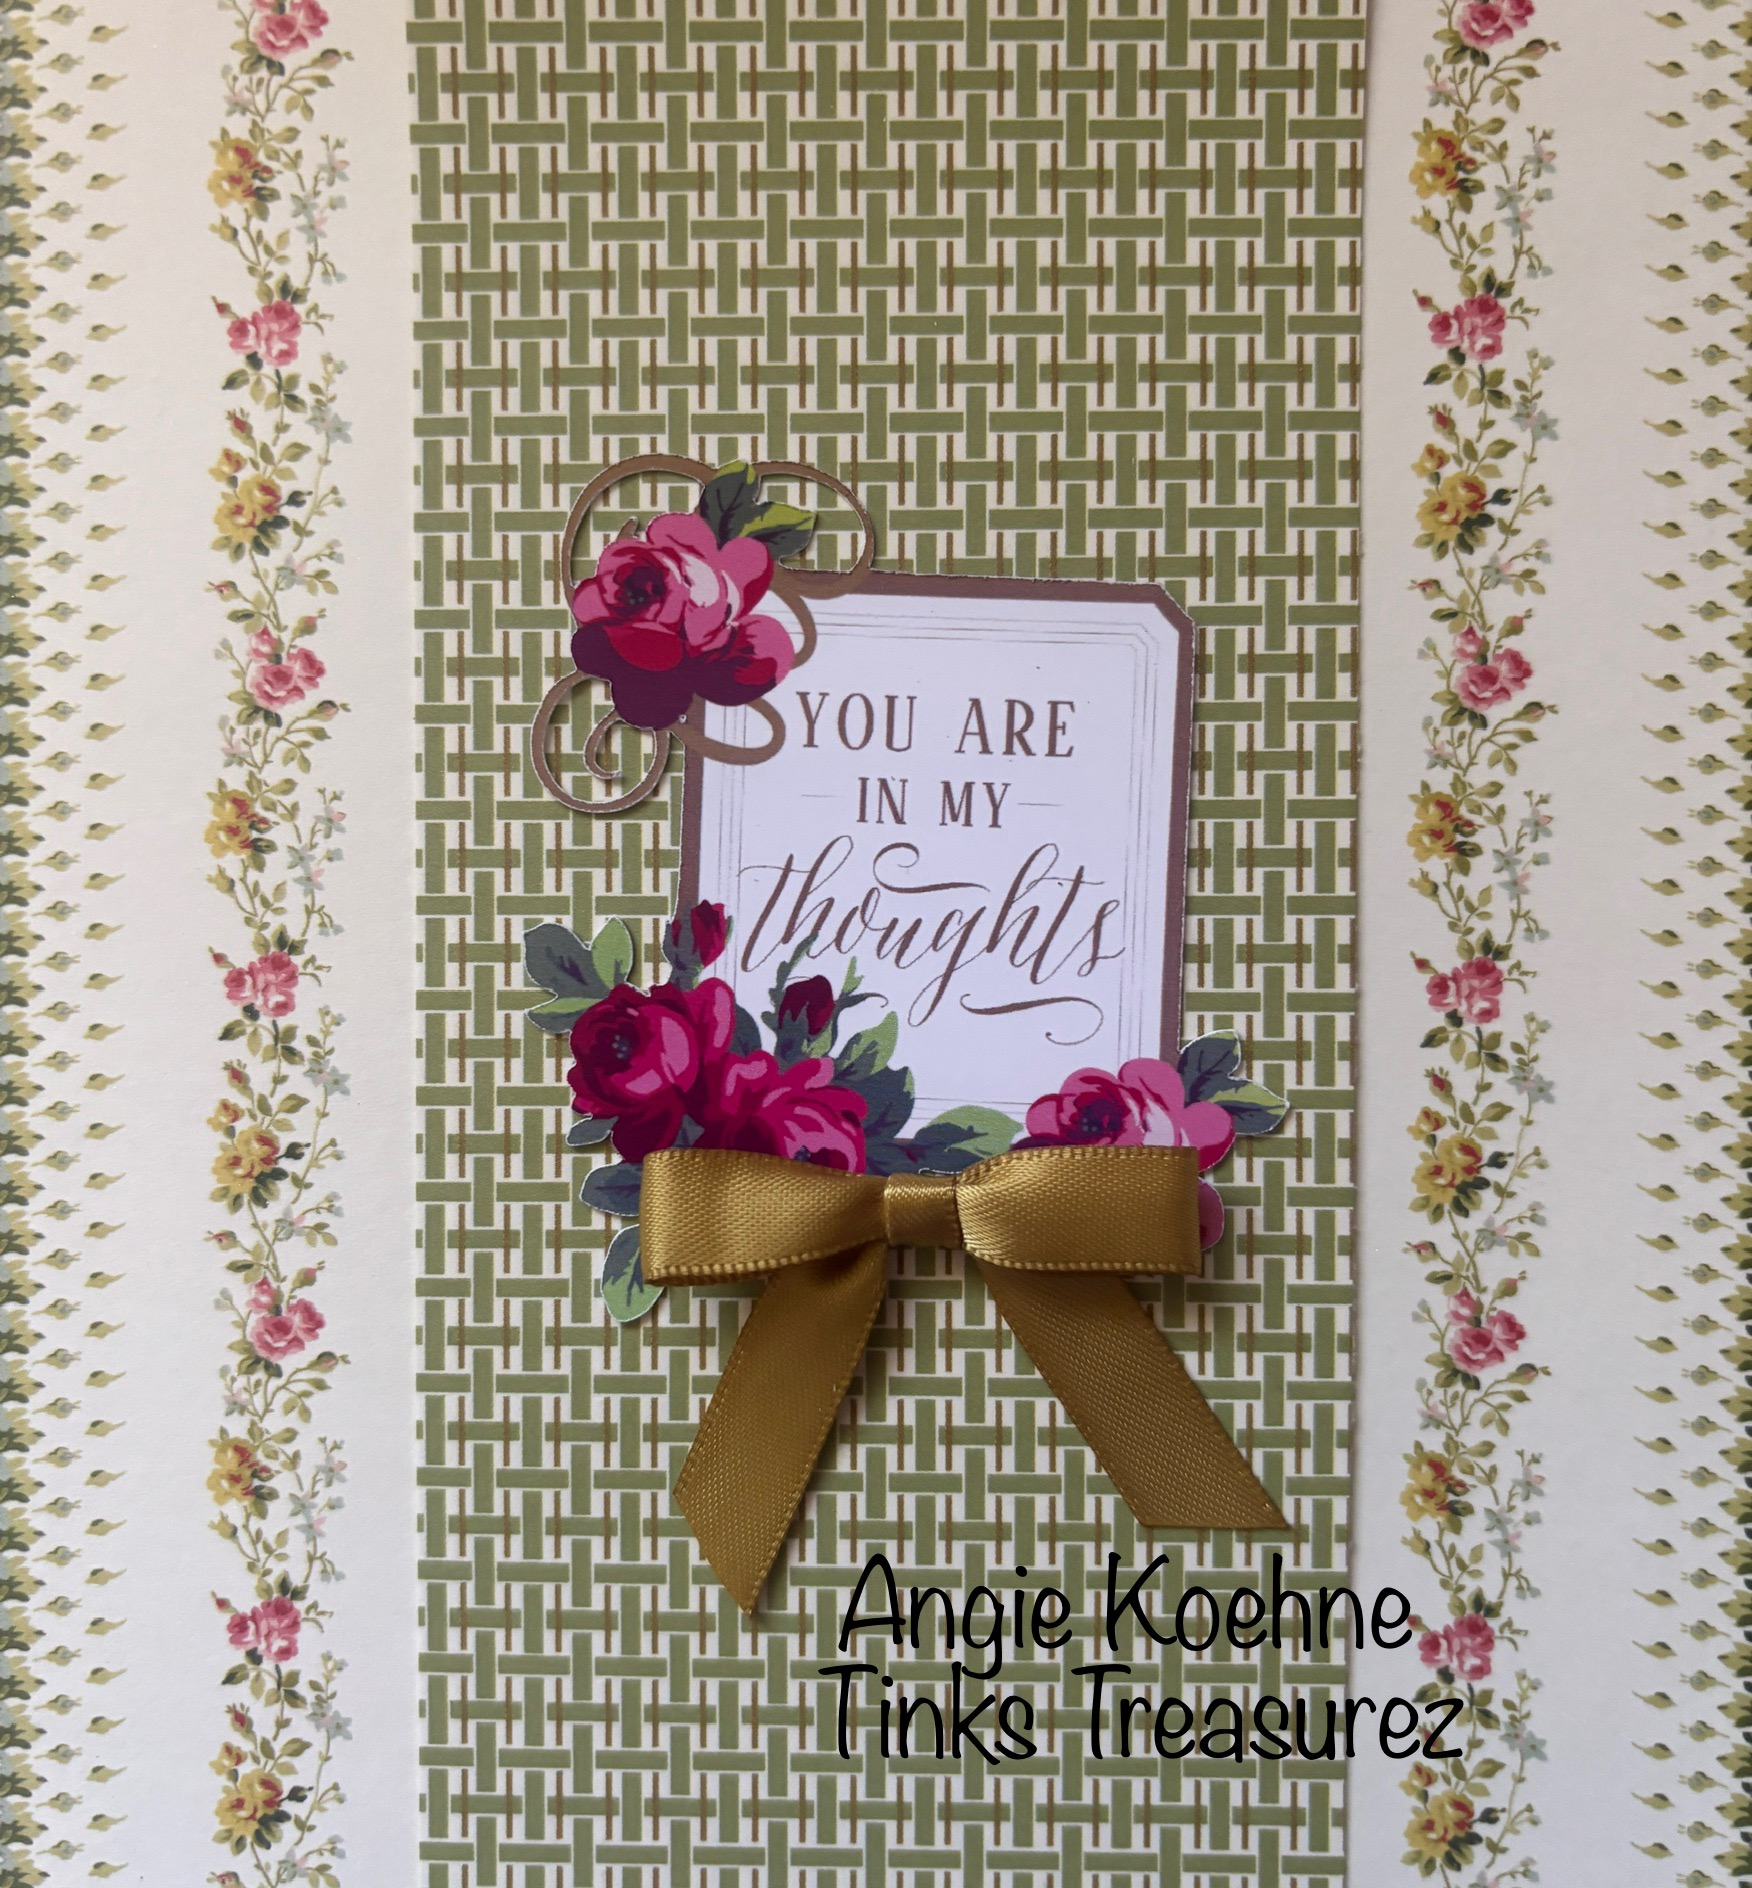
Each SVG I release is made with love and creativity, and this one is no different. It’s perfect for adding that handmade touch to your next project — and the best part? It’s totally free for all my blog followers!


🌟 What’s Included in the New Free SVG?

This downloadable SVG/PNG file is:

  • Compatible with Cricut, Silhouette, and other cutting machines

  • Cleanly layered and easy to cut

  • Designed with creativity and flexibility in mind

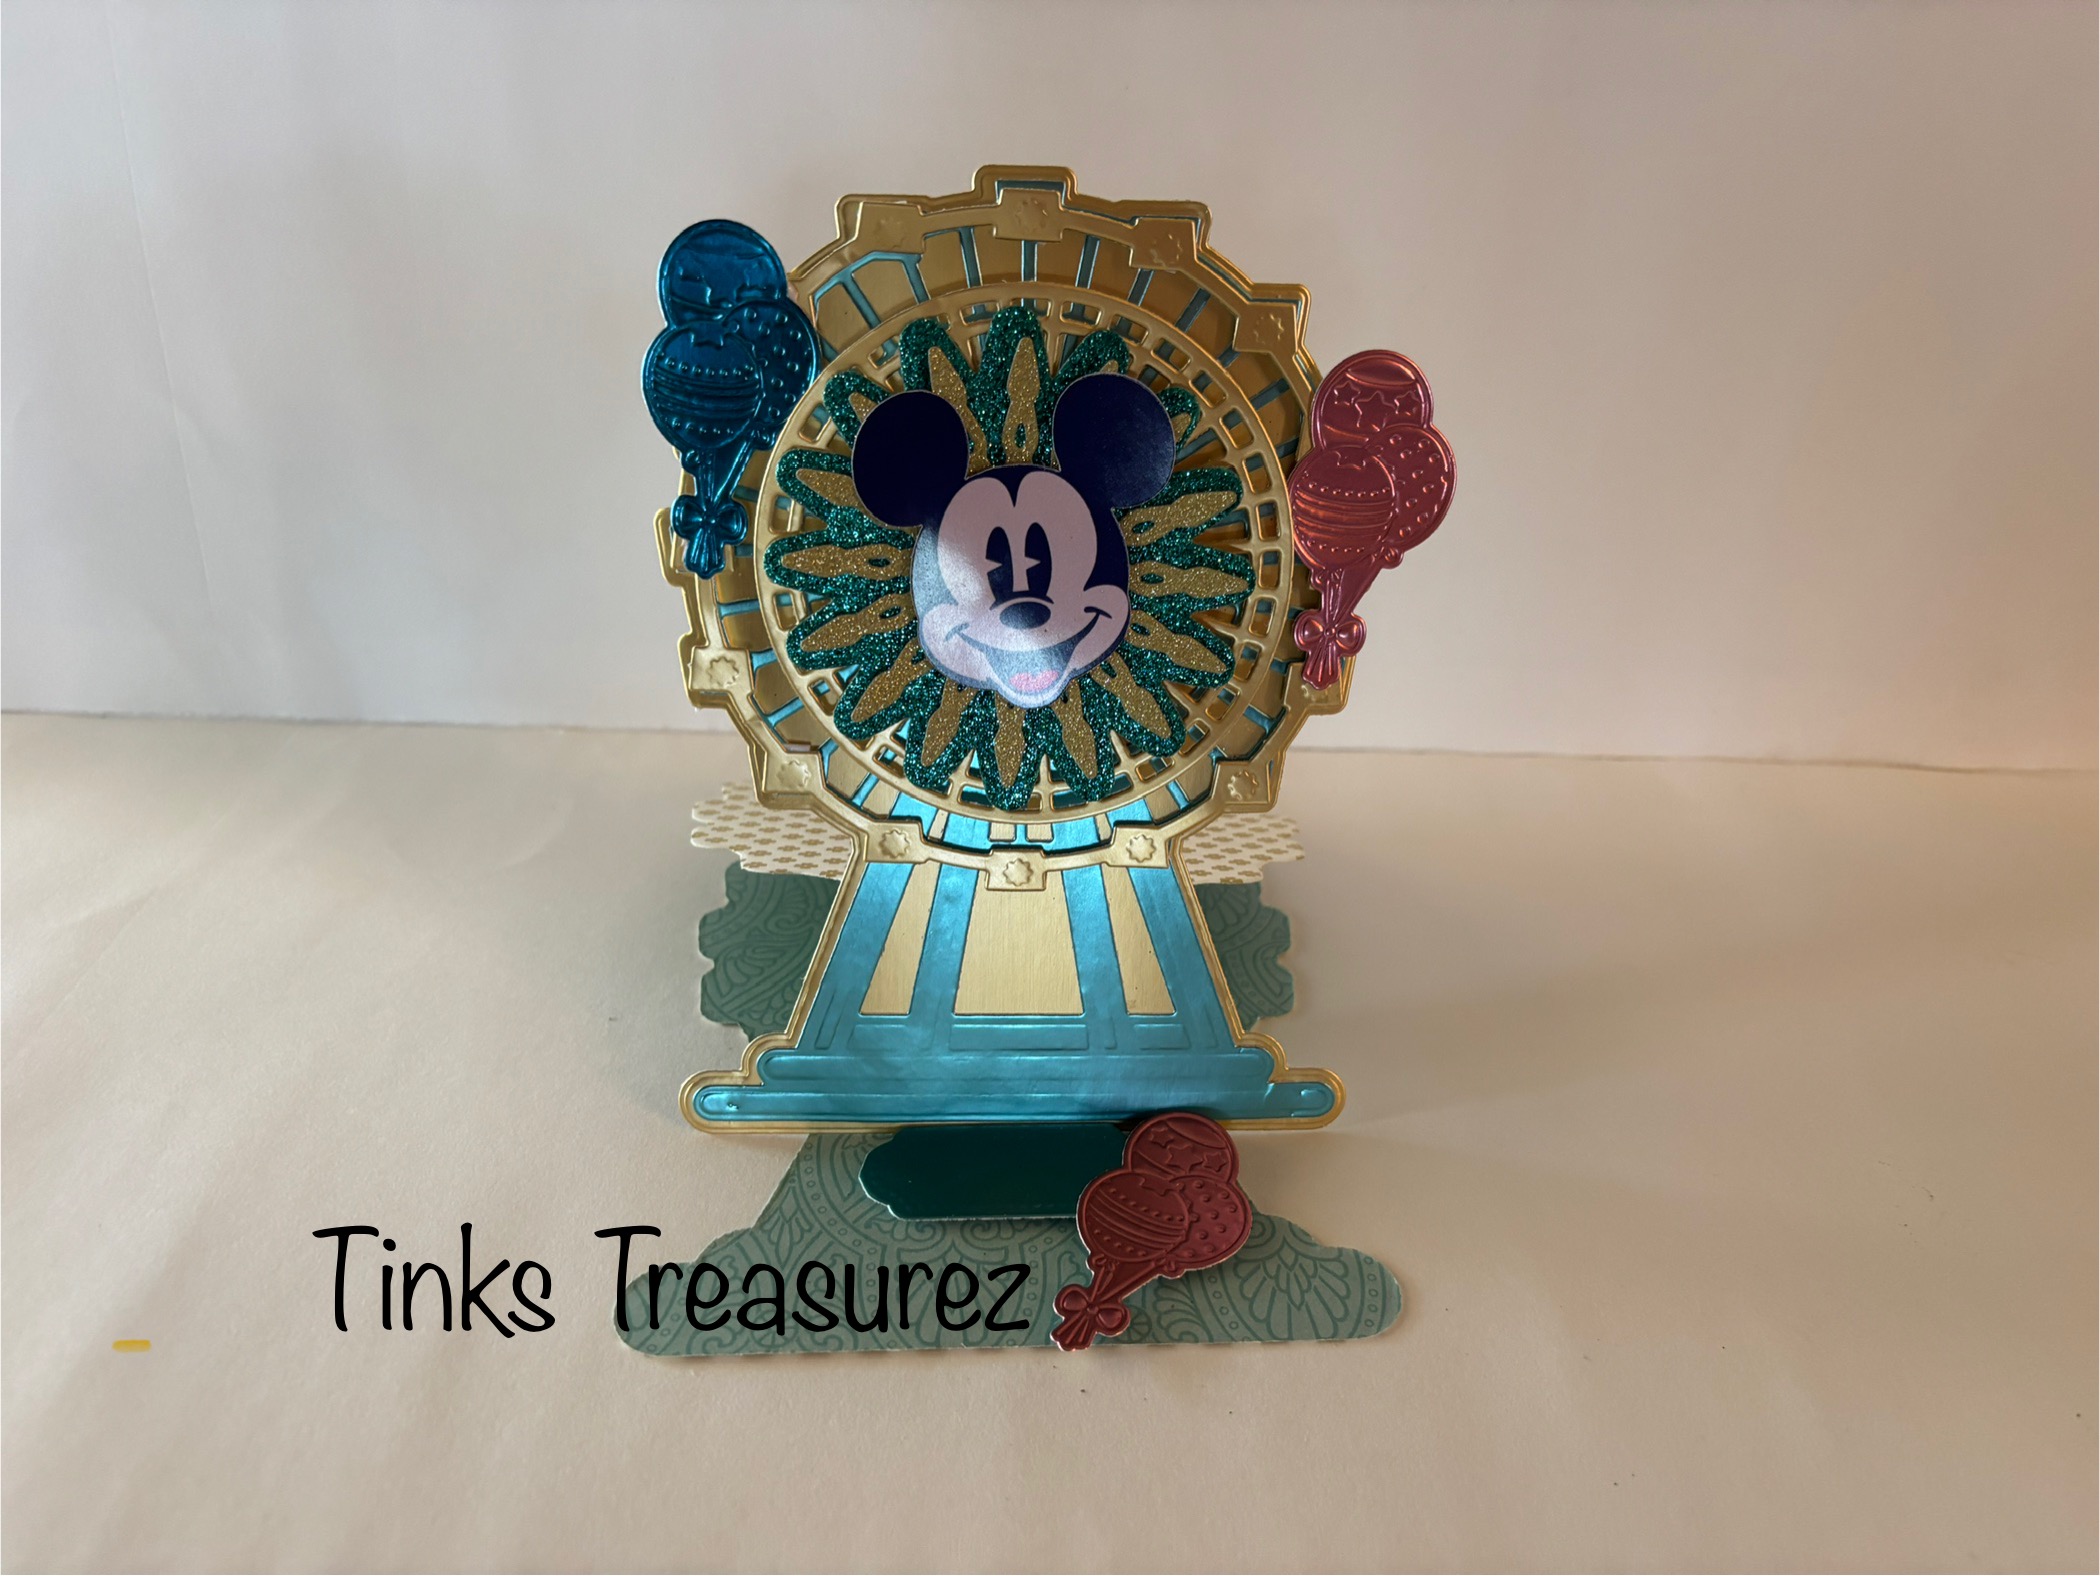
  • Great for mini albums, scrapbook pages, cards, home dΓ©cor, vinyl crafts, and more!

This freebie reflects the style and spirit of everything I love to create — sweet, detailed, and easy to customize for any occasion. Whether you're crafting for birthdays, holidays, or everyday joy, this SVG will add that extra sparkle.


πŸ–±️ How to Download

Getting your hands on this file is easy!
πŸ‘‰ Simply πŸ’Œ Bookmark https://tinkstreasurez.blogspot.com  Not subscribed yet? Join the Tinks Treasurez community on Instagram and Facebook to be the first to receive new freebies, tutorials, and crafty updates!


πŸ‘‰ Here’s how to get your free SVG:

  1. Follow me on Instagram and Facebook: @TinksTreasurez

  2. Get instant access to download your FREE SVG file!

  3. LINK: SVG Freebie

  4. These are for personal use only.  No sharing.  You may NOT sell these items as finished or digital.


πŸ›️ Want More SVGs and Cut Files?

Visit my Etsy shop for exclusive SVG sets, handmade card files, and printable crafts designed with crafters like YOU in mind:
πŸ‘‰ Tinks Treasurez on Etsy


πŸ’¬ Let’s Stay Connected

I’d love to see what you make with this SVG! Tag me on social media or drop a comment below. Your creativity inspires me every day, and it means the world to know my designs help bring your ideas to life.

Until next time — keep crafting, keep sharing, and don’t forget to grab your freebie!
πŸ’– Angie Koehne
Tinks Treasurez


πŸ“Έ Create a Stunning DIY Product Photo Backdrop | Perfect for Etsy & eBay Sellers

πŸ“Έ Create a Stunning DIY Product Photo Backdrop | Perfect for Etsy & eBay Sellers

By Angie Koehne | Tinks Treasurez

If you're a handmade seller or reseller on Etsy, eBay, or any online marketplace, one of the most powerful tools for standing out is your product photography. Shoppers are visual, and your photos are often the first — and sometimes only — chance to grab their attention. But here’s the good news: you don’t need a fancy studio or expensive equipment to take eye-catching product shots.

In this post, I’ll show you how to create a beautiful, budget-friendly DIY product photo backdrop that enhances your items and helps your listings shine. Whether you sell paper crafts, SVG files, vintage finds, or handmade goods, this simple setup will help you create consistent, professional-looking photos that build trust with your buyers.

Check out my YouTube Video tutorial for tips on creating your own product photo backdrop:


✨ Why Your Photo Backdrop Matters

A well-designed backdrop helps:
✅ Keep focus on the product
✅ Reflect your brand aesthetic
✅ Create a consistent, professional look across your shop
✅ Increase buyer confidence and clicks


πŸ› ️ Supplies You’ll Need

You don’t need much to create your own photo backdrop. Here's a simple list of affordable materials:

  • Foam boards (white or neutral colors)

  • Peel-and-stick wallpaper or contact paper (woodgrain, marble, linen, etc.)

  • Natural light or a ring light

  • A table or flat surface near a window

  • Props (optional: plants, fabric, risers, etc.)


πŸ“· How to Set It Up

Step 1: Choose a Background

Pick a wallpaper or poster board with a clean, neutral or lightly textured look — think white wood planks, linen gray, or soft marble. Avoid bold patterns that might distract from your product.

Step 2: Create the Backdrop Wall

Tape or glue your background material to a piece of foam board. This will be your upright “wall” in the photo. You can create a second matching “floor” surface, or keep the table surface neutral.

Step 3: Set Up Your Shooting Area

Position your table near a window with diffused natural light, or use a soft ring light for even illumination. Stand the foam board vertically on the back of your table, creating an L-shape with your surface.

Step 4: Place Your Product & Style

Set your product in the center and adjust for scale. Add small props if desired — but keep them simple and relevant to your item. For example, greenery next to a handmade card, or twine near a rustic decor piece.

Step 5: Snap & Adjust

Take multiple shots from different angles: front, side, and top-down. Edit lightly to brighten and crop, but keep the photo true to your actual item.


🎨 Bonus Tips for Etsy & eBay Sellers

  • Always use natural daylight if possible — it flatters products best

  • Stay consistent with your background across listings to build brand trust

  • Use mockups sparingly for digital products — real photos often perform better

  • Test your backdrop with a few different items before committing to one style


πŸ›️ Looking for Handmade SVGs or Card Ideas?

Check out my Etsy store:
πŸ‘‰ Tinks Treasurez on Etsy

And don’t forget to subscribe to the blog for free SVGs, crafty inspiration, and tutorials like this one!


πŸ’¬ Let’s Chat

What kind of backdrop works best for your shop? Have a favorite material or photography trick? I’d love to hear it in the comments below! πŸ“©

Until next time,
Happy crafting & happy selling!
Angie Koehne | Tinks Treasurez


Wednesday, June 4, 2025

πŸŽ€ Anna Griffin’s New Waterfall Die + Mini Album Magic – Part 3 (Completed Project!) πŸ“–✨

πŸŽ€ Anna Griffin’s New Waterfall Die + Mini Album Magic – Part 3 (Completed Project!) πŸ“–✨

By Angie Koehne | Tinks Treasurez

Hi crafty friends! πŸ’•
We’ve made it to Part 3 of our creative journey, and I’m so excited to share the final reveal of our Anna Griffin Waterfall Mini Album project! From cutting and assembling to layering and decorating, this project has been filled with so much elegance, fun, and interactive joy — and now it’s time to see it all come together.

If you’ve followed along from Part 1 and Part 2, you know we’ve used Anna Griffin’s brand-new Waterfall Die along with her Mini Album Die Set to build a one-of-a-kind keepsake. And today… it's officially complete! πŸŽ‰


πŸ“½️ Watch the Completed Project on YouTube

Want to see the finished album flip-through and hear my final thoughts?
πŸ‘‰ Watch Part 3 of the video series here

✨ The Final Touches

Once the structure and waterfall mechanism were in place, I focused on the little details that give the album that signature “Anna Griffin charm.” Think layers of florals, sentiment panels, gold foil accents, and just a hint of sparkle.

🌸 Here’s what I added in Part 3:

  • Fully embellished waterfall panels (each one is like a mini card!)

  • Added tuck spots and hidden journaling areas

  • Coordinated ribbon ties and decorative tabs

  • Dimensional die cuts, lace, and pearls

  • Finished cover design that ties it all together beautifully


The basket weave cardstock we used as a base gave the project a rich texture, and every turn of the page adds another wow moment. I couldn’t be happier with how it turned out!


πŸ›️ Craft Supplies & More

Love this look? You can find SVG files, custom embellishments, and digital designs in my Etsy shop:
πŸ‘‰ Visit Tinks Treasurez on Etsy

Anna's products: www.AnnaGriffin.com

πŸ’Œ And don’t forget to subscribe to the blog for updates, freebies, and more tutorials like this one!


❤️ Final Thoughts

This project is a reminder of what I love most about paper crafting — how a few tools, a little time, and a lot of love can turn cardstock into something truly magical. Whether you're making a gift, a memory album, or a piece for yourself, Anna Griffin’s dies bring elegance and timeless beauty to every page.

Thank you so much for joining me through this mini album series. If you created one of your own, I’d love to see it — feel free to share in the comments or tag me on social media!

Until next time,
Keep crafting with heart.
Angie Koehne | Tinks Treasurez


🌸 Anna Griffin’s New Waterfall Die + Mini Album Magic: Part 2

🌸 Anna Griffin’s New Waterfall Die + Mini Album Magic: Part 2

By Angie Koehne | Tinks Treasurez

Welcome back, crafty friends! ✨
If you’ve been following along with our Anna Griffin Waterfall Die + Mini Album journey, then you know I'm in the middle of creating something truly magical. In Part 1, we built the base of our album using Anna Griffin’s Mini Album Die Set and started assembling the stunning waterfall feature using her brand-new Waterfall Die.

Today in Part 2, we’re diving into the fun part: decorating, layering, and bringing it all together with Anna’s elegant embellishments and signature cardstock!


πŸ’– Let’s Pick Up Where We Left Off...

With the structural pieces in place, it’s time to let your creativity shine. The waterfall mechanism works beautifully, and now it’s all about adding that signature Anna Griffin charm to each flip panel and page.

✂️ What I Used in This Step:

  • Anna Griffin Waterfall Die & Mini Album Die Set

  • Photos

  • Cardstock

πŸ“½️ Watch the Process on YouTube

Want to see how it all comes together? Watch Part 2 of my video series on YouTube, where I walk through every decorative layer and tip I’ve learned along the way.  πŸŽ₯ 


🌼 Step-by-Step Highlights:

1. Decorating the Waterfall Panels

Each panel becomes its own mini canvas. I add photos to the waterfall and show placement for it flip perfectly.


2. Coordinating Color Schemes

I used soft florals and pastels from the Basket cardstock collection for this album to give it a, timeless feel. The basket weave cardstock from Part 1 made a lovely textural base that elevated the whole design.


3. Adding Interactive Pockets

Using elements from the Mini Album Die Set, I added side pockets and tuck spots behind a few panels — perfect for tags, notes, or photos.


4. Finishing Touches

Check back for the last video where I add the finishing touches.


πŸ›’ Grab the Supplies

Love what you see? You can find SVG files, embellishments, and exclusive paper crafts in my Etsy shop:
πŸ‘‰ Tinks Treasurez Etsy Shop

For Anna's products, you can find them on her website: AnnaGriffin.com


✨ Final Thoughts

This project truly showcases why I love Anna Griffin’s designs — elegant, interactive, and endlessly customizable. The waterfall die adds so much movement and magic to any album, and paired with the mini album base, it's the perfect combination for a heartfelt handmade gift.

Thanks for crafting with me! Be sure to subscribe to the blog for more tutorials, check out my YouTube channel, and don't forget to grab your free SVGs while you're here!

πŸ’– Until next time, happy crafting!
Angie Koehne | Tinks Treasurez


Wednesday, May 28, 2025

Crafting Elegance: Anna Griffin's New Waterfall Die + Mini Album Magic

πŸ“š✨ Crafting Elegance: Anna Griffin's New Waterfall Die + Mini Album Magic

Posted by Angie Koehne | Tinks Treasurez

Hello, lovely crafters! πŸ’–

Today, I’m thrilled to share a gorgeous new project featuring a few of my favorite tools from the ever-elegant Anna Griffin collection! If you're a fan of interactive albums and dimensional detail, you're going to love this combination.

πŸŽ€ Featured Supplies:

  • Anna Griffin Waterfall Die (new!)

  • Anna Griffin Mini Album Die Set

  • Anna Griffin Basket Weave Cardstock

πŸ“Έ Want to See It in Action?

Check out my full tutorial video on YouTube where I walk you through the process from start to finish of the waterfall die and the building of the album.πŸŽ₯ 


These three elements will come together beautifully to create a sophisticated, layered mini album that flips, folds, and sparkles with that signature Anna Griffin flair.  Embellishing to be in part 2.

Front Cover


Back Cover

πŸ’‘ Why I Love This Die Combo

The Waterfall Die is perfect for adding interactive elements to any project. When paired with the Mini Album Die Set, it creates a dynamic and flowing visual experience! The die is intuitive and pairs seamlessly with Anna’s pre-sized album pages.

To add a touch of texture and class, I used Anna’s Basket Weave Cardstock, which adds depth without overwhelming the delicate floral and foil accents in the rest of the design.


🧡 How I Built My Album

  1. Base Construction: I began by cutting and assembling the mini album base using the die set. This set includes spine die, frame dies and an embossing folder.

  2. Waterfall Magic: Next, I added the panel for 5 pictures, waterfall insert on one of the interior of the back cover.  The Waterfall Die made this so simple—it scores and cuts all in one pass!

  3. Details & Layers: I used the Basket Weave Cardstock on the front and inner covers for texture.

  4. Finishing Touches: will be added in the next video.


✂️ Final Thoughts

If you’ve been wanting to try the Anna Griffin Waterfall Die, this is the perfect way to dive in. It’s easy to use, adds such a beautiful effect to any album, and when combined with the Mini Album Die Set and Basket Weave Cardstock — it’s just crafting perfection.

Have questions or want to share your own waterfall project? Leave a comment below or tag me on social using #TinksTreasurez — I’d love to see what you’re making!

Until next time, stay creative and keep crafting with heart. πŸ’•
– Angie Koehne, Tinks Treasurez


Friday, May 23, 2025

πŸŽ‰ Exciting News from Tinks Treasurez! | Free SVGs 🎨

πŸŽ‰ Exciting News from Tinks Treasurez! | Free SVGs 🎨

Hey, crafty friends!

I’m so excited to share some big news with you today! Here at Tinks Treasurez, I’m always looking for ways to add a little more sparkle and inspiration to your crafting journey — and today, I’m thrilled to introduce a brand new feature for all my blog followers!

🌟 FREE SVG File with Every Blog Follow!
That’s right!  πŸ’Œ Bookmark https://tinkstreasurez.blogspot.com. When you follow the Tinks Treasurez blog, you’ll now get exclusive access to a FREE SVG cut file — perfect for your card making, scrapbooking, or Cricut and Silhouette projects. It’s my little “thank you” for being part of this amazing creative community.  Many include Disney themes or a fun vacation design.

These SVG freebies will be updated regularly, so make sure you stay subscribed to get the latest designs delivered right to your inbox. Whether you're making personalized cards, crafting home dΓ©cor, or designing gifts, these SVGs are made to inspire your creativity.

πŸ›️ Visit the Tinks Treasurez Etsy Store
Looking for even more crafting magic? Be sure to check out the Tinks Treasurez Etsy shop, where you’ll find Disney inspired digital downloads, and more themes. This week's FREEBIE includes, It's Wondrous for the new fireworks show: Wondrous Journey


πŸ‘‰ Here’s how to get your free SVG:

  1. .πŸ’Œ Bookmark https://tinkstreasurez.blogspot.com

  2. Get instant access to download your FREE SVG file!

  3. LINK: SVG Freebie

  4. These are for personal use only.  No sharing.  You may not sell these items as finished or digital.

πŸ’Œ Stay connected — and don’t forget to share your creations with me on social media using the hashtag #TinksTreasurez. I absolutely LOVE seeing what you create!

Thanks again for being here, supporting handmade, and keeping creativity alive. I can’t wait to see what you make with your free SVG!

Happy crafting,
Angie Koehne
Creator of Tinks Treasurez


Wednesday, May 21, 2025

✂️ Create Stunning Card Toppers with Anna Griffin & Cricut as Print Then Cut

Absolutely! Here's a blog post for “Create Stunning Card Toppers with Anna Griffin & Cricut”:


✂️ Create Stunning Card Toppers with Anna Griffin & Cricut

Looking to add a touch of elegance and charm to your handmade cards? Let’s talk about one of my favorite ways to elevate your paper crafting: making card toppers using your Cricut and Anna Griffin designs!

Whether you’re a seasoned crafter or just getting started, this project is perfect for adding that luxurious, layered look to your cards—without spending hours on each one. Anna Griffin's beautifully intricate elements paired with the precision of Cricut make this a match made in crafting heaven.


πŸ“Ί Watch the Tutorial

Want to see the process in action? Check out my YouTube tutorial where I walk through everything step-by-step and share tips for creating cohesive color palettes and perfect placement every time. πŸ‘‰ Watch Here 


πŸŽ€ Why Card Toppers?

Card toppers are a game-changer in card making. They're versatile, time-saving, and allow you to pre-assemble beautiful focal points that can be added to any blank card base in minutes. I love creating a batch of them to keep on hand for last-minute cards, or to mix and match when inspiration strikes.


πŸ–¨️ What You'll Need:

  • Cricut machine (any model that uses Design Space)

  • Anna Griffin digital designs 

  • Cardstock in coordinating colors

  • Adhesives (tape runner, foam dots for dimension)

  • Anna Griffin embellishments (like her signature bows!)

  • Optional: embellishments like pearls, die-cuts, or sentiments


πŸͺ„ Step-by-Step Tutorial:

  1. Choose Your Design
    Browse your Anna Griffin digital library or Design Space files and select a designs that fits your theme—floral, vintage, birthday, thank you, etc.

  2. Cut Your Layers
    Use your Cricut to cut each piece with precision. I recommend using a mix of foil, textured, and smooth cardstock for a rich layered effect.

  3. Assemble with Dimension
    Use foam adhesive to layer each piece, giving your topper depth and a 3D look. Add sentiments or decorative die-cuts on top.

  4. Add Finishing Touches
    No Anna Griffin project is complete without one of her signature bows. Add one to the corner or center of your topper to instantly elevate the whole piece.

  5. Store or Use
    Attach to a blank card base or store in a clear sleeve to use later. These toppers make excellent gifts for fellow crafters too!


πŸ’‘ Pro Tip:

Create themed batches—anniversaries, weddings, thinks of you—and keep them organized by occasion. You’ll never be short on a handmade card again!


πŸ’¬ Share Your Creations!

I’d love to see what you make! Tag me @TinksTreasurez on Instagram or leave a comment on the video with your favorite Anna Griffin elements to use in your toppers.


Happy Crafting, and remember: a little bow goes a long way! πŸŽ€


Thursday, May 15, 2025

Anna Griffin Ferris Wheel Easel Card ~ Disney Mashup ~ Craft With Me

Spin into Magic: Anna Griffin Ferris Wheel Easel Card ~ Disney Mashup! 🎑✨

Calling all Disney fans and paper crafters! I’m thrilled to share one of my most whimsical projects yet—the Anna Griffin Ferris Wheel Easel Card with a Disney-themed twist. If you love combining elegance with a touch of magic, this one's for you!

In my latest Craft With Me video on YouTube, I walk you through how to create this stunning 3D easel card using Anna Griffin’s beautiful Ferris Wheel die set—then add a bit of Disney flair to make it truly enchanting. Think glitter, bold colors, and familiar characters that bring joy to any card recipient (or your own craft shelf!).

πŸ“Ί Watch the full tutorial here: 


🎠 Here’s what makes this mashup so special:

  • Elegant Anna Griffin design meets playful Disney charm

  • Perfect for kids' card & parties, Disney vacations, or just-for-fun crafts

  • Customizable color palettes and character accents

  • Step-by-step tutorial that’s beginner-friendly but fun for advanced crafters too!


πŸ’‘ Pro Tip: This card also makes a magical keepsake or display piece for a Disney-themed room or celebration!

You can find SVGs and extra crafting goodies in my TinksTreasurez Etsy shop if you want to recreate the look or add your own spin.

As always, I’d love to see what you create—tag me on social or leave a comment on the video!


Happy crafting and may all your projects have a little pixie dust! 🧚‍♀️✨


Tuesday, May 13, 2025

Anna Griffin Circus Tent Easel Card ~ Dumbo ~ Disney Mash Up ~ Craft With Me


πŸŽͺ Anna Griffin Circus Tent Easel Card | Dumbo Disney Mashup ~ Craft With Me!

Step right up for a magical blend of vintage elegance and Disney wonder! In my latest YouTube tutorial, I’m sharing how to create an Anna Griffin Circus Tent Easel Card—with a charming Dumbo-inspired Disney twist. 🐘✨

This whimsical card is full of nostalgic circus vibes, interactive dimension, and storytelling charm. Whether you’re a Disney fan, Anna Griffin die lover, or just looking for a fun and creative card-making project, this mashup is the perfect "Craft With Me" moment.


πŸŽ₯ Watch the Full Tutorial Here:


In the video, I take you through every step of crafting this Circus Tent Easel Card—from cutting and assembling the layers to adding Dumbo-themed embellishments and that classic Anna Griffin elegance.


🎠 What You’ll Learn in the Video:

  • How to use the Anna Griffin Circus Easel Card Die Set

  • Tips for layering patterned cardstock for a dimensional tent effect

  • Adding Disney magic with Dumbo images and circus details

  • How to make your easel card stand beautifully

  • Ways to personalize with shimmer, texture, and themed embellishments


🧰 Supplies I Used:

  • Anna Griffin Circus Tent Easel Card Die Set

  • Empress Die Cutting Machine (or other compatible machine)

  • Dumbo images (printed, stickers, or cut files)

  • Coordinating patterned papers and glitter cardstock

  • Foam tape and strong adhesive

  • Embellishments: balloons, banners, gold foil accents


πŸŽͺ Why You’ll Love This Project:

  • Interactive and eye-catching design that folds flat for mailing

  • Combines storybook magic with elegant design elements

  • Great for kids cards, baby showers, Disney fans, or nursery decor

  • A true show-stopper for your handmade card collection

  • It’s fun, imaginative, and a great way to try new card-making techniques!


🐘 Crafting Tips from the Video:

  • Choose pastel or circus-themed colors for an authentic feel

  • Layer your Dumbo elements with foam for 3D depth

  • Use shimmer paper or metallic accents to highlight details like the tent top and poles

  • Add circus ticket-style sentiments or banners for extra flair

  • Secure the easel base firmly to support the tent structure


πŸ’« Final Thoughts

This Circus Tent Easel Card featuring Dumbo is a celebration of childhood wonder, creativity, and crafting joy. Whether you’re gifting it to someone special or keeping it as part of your Disney card collection, it’s a magical project that’s sure to impress.


πŸ‘‰ Ready to craft with me? Watch the full tutorial here:

https://youtu.be/H1Ej0XL45Ns?si=f9Qy1Fflpebodtsn

If you give this card a try, tag me or leave a comment on the video—I’d love to see how you make it your own! Let’s keep spreading creativity, one magical card at a time. πŸŽͺπŸ’Œ


Anna Griffin Wishing Well Easel Card ~ Snow White ~ Disney Mashup ~ Craft With Me

🏰 Anna Griffin Wishing Well Easel Card | Snow White Disney Mashup ~ Craft With Me!

If you’re a fan of fairytales, Disney magic, and elegant paper crafting, you’re going to love this creative mashup! In my latest YouTube video, we’re diving into a “Craft With Me” session to make a Wishing Well Easel Card using the beautifully detailed Anna Griffin dies—with a special Snow White-inspired twist.

This project blends classic Anna Griffin style with beloved Disney storytelling, bringing a magical scene to life on your craft table. From charming embellishments to interactive easel folds, this is a card that tells a story and makes a statement.


πŸŽ₯ Watch the Full Craft-Along Tutorial:

In this video, I’ll show you:

  • How to assemble the Anna Griffin Wishing Well Easel Card

  • Tips for incorporating Disney ephemera like Snow White, woodland creatures, and the wishing well scene

  • Techniques for layering and adding 3D elements

  • Ideas to personalize your card with sparkle, shimmer, and themed embellishments

  • How to make the card stand beautifully as a display piece!


🧰 Supplies You’ll Need:

  • Anna Griffin Wishing Well Easel Card Die Set and Castle Die Set

  • Empress Die Cutting Machine (or compatible machine)

  • Disney-inspired images or stickers (Snow White, woodland animals, etc.)

  • Patterned paper, foil cardstock, vellum

  • Foam tape, glue, and embellishments (gems, ribbon, florals)

  • Optional: glitter pens, ink, distressing tools for detail


🍎 Why This Project Is Magical:


  • It’s a stunning keepsake that’s both interactive and decorative

  • Adds a Disney twist to elegant card making

  • Perfect for Princess cards, Disney-themed events, or framing as artwork

  • Combines the best of paper layering, die cutting, and storytelling

  • Snow White’s charm pairs perfectly with the wishing well scene—it’s a fairytale moment!


✨ Crafting Tips From the Video:

  • Use vellum or clear acetate behind the wishing well for a dreamy background, I used a Castle

  • Pop up Snow White with foam tape to create depth

  • Add glitter accents to mimic sparkles from the "wishing" moment

  • Create a forest floor with leaf die cuts, mushrooms, or tiny flowers

  • Don’t forget to embellish the base of the easel card—it’s part of the magic!


🌟 Final Thoughts

This Wishing Well Easel Card is more than just a paper craft—it’s a tiny, handmade storybook scene. Whether you're crafting for a Disney fan, making a card for a special occasion, or just indulging in your love of all things fairytale, this project will leave you completely enchanted.


πŸ‘‰ Join me for the full tutorial on YouTube here:

https://youtu.be/sNCeS7CiH98?si=qO04RmDF4n7dOVpd

I’d love to see your version of this card—especially if you add your own Disney favorites! Tag me on social media or leave a comment on the video so we can share the magic together. ✨🍎

Happy crafting, and may all your wishes come true!


Captain Hook Tinkerbell Lantern ~ Pirate Sconce~ DIY Craft~Disney Inspired


🏴‍☠️ Captain Hook & Tinkerbell Lantern | Pirate Sconce DIY ~ Disney-Inspired Craft!

Looking to add a magical and mischievous touch to your decor? This project is for every Disney lover, pirate enthusiast, and DIY crafter at heart! In my newest YouTube tutorial, I show you how to create a Captain Hook & Tinkerbell Lantern—a whimsical, Disney-inspired pirate sconce that combines Neverland charm with handmade creativity.

Perfect for a themed room, party decoration, or just because you love a little pixie dust and pirate flair, this lantern brings the magic of Peter Pan to life!


πŸŽ₯ Watch the Full DIY Lantern Tutorial:


In this video, I’ll walk you through:

  • How to create a lantern-style wall sconce from simple, affordable materials

  • Designing and assembling your own Tinkerbell inside the lantern

  • Adding pirate-inspired details like Captain Hook’s hook

  • Using fairy lights for a magical nighttime glow

  • Tips to decorate your piece to feel straight out of Neverland!


🧰 Supplies You’ll Need:

  • lantern with Fairy lights from Lowes

  • Tinkerbell to place in your lantern

  • Hot glue gun & crafting glue

  • Hook and red velvet fabric

  • PVC stick 3" wide about 6" long or your desired length, and PVC toilet flange


✨ Why This Craft is So Fun:


  • Combines Disney magic with DIY ingenuity

  • Great for themed bedrooms, playrooms

  • Fun for both kids and adults—easy to customize!

  • Adds mood lighting and storybook vibes to any space

  • Makes a one-of-a-kind gift for Disney fans!


🧜 Crafting Tips from the Video:

  • Use hot glue to add your fabric to cover your PVC

  • Add a touch of epoxy or glue inside the hook to secure it from moving around

  • Want more drama? Add chains or a skull and crossbones motif for extra pirate flair

  • Customize it with other characters—think Peter Pan, Smee, or even a Crocodile pop-up!


🌟 Final Thoughts

This Captain Hook & Tinkerbell Lantern is more than just a craft—it’s a tribute to imagination, storytelling, and the magic of Neverland. Whether it’s for a child’s room, a Disney-themed event, or simply a fun weekend project, this DIY sconce adds a touch of enchantment wherever it hangs.


πŸ‘‰ Ready to make your own magical lantern? Watch the full tutorial now:

https://youtu.be/0mQCp3vTQ2U?si=GBzKOHZSbgNN75te

Don’t forget to like, comment, and subscribe on YouTube for more Disney-inspired DIYs and creative paper crafts. And if you make your own version, tag me—I’d love to see how your Tinkerbell lights up the night! πŸ’«


Anna Griffin Carousel & Castle Pulley Card ~ Disney MashUp ~ Craft With Me

🏰 Anna Griffin Carousel Castle Pulley Card | Disney MashUp ~ Craft With Me!

If you love crafting, Disney magic, and elegant design, you’re going to adore this project! In my latest YouTube tutorial, I’m combining the charm of Anna Griffin's Carousel & Castle dies with a Disney twist to create a whimsical Pulley Card that’s interactive, stunning, and so much fun to make.

Join me for a Craft With Me session where I walk you through the entire process step-by-step—from die cutting to embellishing to assembling the pulley mechanism—so you can create your own magical, fairytale-inspired card at home!


πŸŽ₯ Watch the Full Craft-Along Tutorial:


In this video, you’ll learn how to:

  • Use the Anna Griffin Carousel & Castle dies with the base of a pulley-style interactive card

  • Add Disney-themed elements like your favorite princesses

  • Build the pulley mechanism so your card has movement and dimension

  • Layer embellishments for that signature Anna Griffin elegance

  • Customize your card for themed parties, or collector keepsakes


🧰 Supplies Used:

  • Anna Griffin Carousel & Castle Die Sets with the Pulley Card Set

  • Heavyweight cardstock (for stability)

  • Patterned paper and glitter cardstock for accents

  • Disney-themed embellishments or printed ephemera

  • Foam tape, strong adhesive, and a bone folder

  • Pulley or slider card template/mechanism

  • Empress Die Cutting Machine (or any compatible die cutter)


🎠 Why You’ll Love This Pulley Card:


  • It’s interactive, adding that extra “wow” factor

  • The castle shape makes it perfect for Disney-themed designs

  • Great for kids’ birthdays, princess parties, or handmade gifts

  • Beautiful enough to be displayed—these are keepsake-quality cards

  • Customizable for any character or theme (Frozen, Cinderella, Beauty & the Beast—you name it!)


πŸ’‘ Crafting Tips I Share in the Video:

  • Test your pulley movement before final assembly to avoid tearing

  • Use low-profile foam tape to have dimension

  • Make sure embellishments don’t block the pulley slide

  • Add magical touches with glitter, foil, and vellum layers

  • Print or cut your own Disney graphics to match your recipient’s favorite characters!


🌟 Final Thoughts

The Carousel Castle Pulley Card is a stunning blend of interactive engineering and creative imagination—and when you add Disney magic, it becomes a truly unforgettable piece of handmade art. Whether you're creating for a child, a Disney-loving friend, or just for the joy of crafting, this project is sure to spark smiles.


πŸ‘‰ Ready to craft with me? Watch the full video here:

https://youtu.be/y_67q_5v-KA?si=DES9ZJP62pvZDmfb

Let’s bring this castle to life—one pulley and pixie dust layer at a time! Don’t forget to comment, like, and subscribe on YouTube for more magical paper crafting tutorials. And tag me if you create your own Disney mashup—I’d love to see it!


Anna Griffin Carousel Pulley Card ~ Let's Craft Together


🎠 Anna Griffin Carousel Pulley Card | Let’s Craft Together!

Ready to add a touch of magic to your card making? In my latest YouTube video, I’m sharing a step-by-step tutorial for creating a Carousel Pulley Card using Anna Griffin’s gorgeous materials—and the best part? We craft it together!

This interactive design is not only whimsical and elegant, it’s also incredibly fun to assemble. Whether you’re a seasoned crafter or just getting started with Anna Griffin dies and embellishments, this pulley card is the perfect project to stretch your creativity and enjoy the process.


πŸŽ₯ Watch the Full Tutorial Here:

In the video, I guide you through:

  • Cutting and assembling the carousel base

  • Engineering the pulley mechanism for a smooth interactive effect

  • Layering embellishments and choosing decorative details

  • Tips for keeping your card balanced and functional

  • How to personalize your carousel card for birthdays, baby showers, and more!


🧰 What You’ll Need:

  • Anna Griffin Carousel Die Set

  • Pulley card mechanism or template (handmade or pre-cut)

  • Empress Die Cutting Machine (or your preferred die cutter)

  • Heavyweight cardstock

  • Patterned paper, foil, or glitter accents

  • Foam tape and strong adhesive

  • Embellishments: florals, sentiments, ribbon, or themed pieces


🎑 Why You’ll Love This Project:

The Carousel Pulley Card is a show-stopper that combines beautiful layers with clever motion. It's perfect for:

  • Special occasion keepsakes

  • Children’s card (add a magical or Disney twist!)

  • Baby announcements or showers

  • Craft fair displays and handmade gifts

And it folds flat for mailing—bonus!


πŸ’‘ Helpful Tips From the Video:

  • Use strong adhesive to secure the pulley base—this part needs to hold!

  • Layer with low-profile foam to keep movement smooth

  • Choose embellishments that won’t obstruct the pulley mechanism

  • Test the sliding motion before gluing your final elements

  • Make it your own with themed toppers (think: princesses, animals, or vintage style)


🌟 Let’s Craft Together!

This video is designed to feel like we’re crafting side-by-side, so grab your supplies and join me in real time! Whether you're making this for someone special or just to explore a new card style, I promise you'll finish with something truly magical.


πŸ‘‰ Click here to watch and craft along:

https://youtu.be/_9BxoKdtf6g?si=jPz6YHh1u_8MoI9o

I'd love to see your finished Carousel Pulley Cards! Tag me on social or leave a comment on the video to share your creation. Let’s inspire each other—one card pulley at a time! πŸ’Œ


Monday, May 12, 2025

Anna Griffin Paper Pad Storage - Scrap Paper Storage Idea

πŸ“š Anna Griffin Paper Pad & Scrap Paper Storage Ideas | Craft Room Organization

Do you have stacks of beautiful Anna Griffin paper pads or your favorite designer and piles of scrap paper scattered everywhere? If your craft room feels more cluttered than creative, this blog post is for you! In my latest YouTube tutorial, I’m sharing my go-to storage system for organizing full paper pads and those precious leftover scraps that are too pretty to toss.

With just a few simple supplies and clever sorting tips, you can create a paper storage system that keeps your favorites visible, protected, and ready to use for your next gorgeous project.


πŸŽ₯ Watch the Full Storage Tutorial Here:

In this video, I walk you through:

  • How to store Anna Griffin paper pads to keep them neat and undamaged

  • My favorite method for organizing and using up scrap paper


🧰 Supplies You’ll Need:

  • Designer Paper Pad

  • Cardstock

  • Adhesive

  • Scoreboard and bone folder
        

πŸͺ„ Why Organize Your Paper Stash?


Organizing your paper pads and scraps helps you:
  • Quickly find what you need (no more flipping through piles)

  • Keep papers flat and undamaged

  • Actually use up your scraps instead of forgetting them

  • Stay inspired by what you already own

  • Make more room for future favorites (because we know you'll buy more!)


πŸ’‘ Scrap Paper Organization Tips:

  • Group by color, pattern, or collection

  • Store small pieces in pocket in the back of your paper pad

  • Keep you scraps together with your Paper Pad Collection

  • Use scraps for die cuts, tags, backgrounds, or layered accents


πŸ“¦ Full Pad Storage Tips:

  • Keep collections together by brand or theme

  • Use labeled dividers to separate seasons or project types

  • Avoid overstacking to prevent curling or bending


🌟 Final Thoughts

Your Anna Griffin papers are too beautiful to stay hidden in cluttered piles. With just a little organizing effort, you can create a storage system that works with your space and crafting style. Best of all? You’ll actually use your gorgeous papers more often—because they’ll be easy to see, easy to reach, and too tempting to ignore.


πŸ‘‰ Watch the full tutorial now on YouTube:

https://youtu.be/zp9ffwDGziM?si=IKX86GapyldmHxd7

If this storage system inspires you, leave a comment or tag me in your own craft room transformation—I love seeing how others make their creative spaces functional and beautiful!

Happy crafting and happy organizing! πŸŽ¨πŸ“‚


Anna Griffin Clever Sliding Card Making It Easier Tutorial


πŸŽ€ Anna Griffin Clever Sliding Card | Making It Easier Tutorial

If you’ve ever been intimidated by interactive card mechanisms, this one's for you! In my latest YouTube video, I walk you step-by-step through creating a Clever Sliding Card using Anna Griffin dies—but with a twist. I’ve simplified the process to make it easier and more accessible, so even beginner card makers can enjoy the magic of movement.

This elegant, interactive card is a showstopper—perfect for anniversaries, weddings, or any special occasion. With the right tips and a little prep, you'll be sliding in style in no time!


πŸŽ₯ Watch the Full Sliding Card Tutorial:

In this tutorial, I show you how to:

  • Assemble Anna Griffin’s Clever Sliding Card with ease

  • Customize the look with layered embellishments

  • Ensure smooth movement and alignment

  • Save time with my simplified construction tips

  • Use foam tape and scoring tricks for pro results


🧰 Supplies You’ll Need:

  • Anna Griffin Clever Sliding Card Die Set

  • Empress Die Cutting Machine (or equivalent)

  • 2 photos or design and sentiment

  • Heavyweight cardstock for base layers

  • Patterned paper or foil cardstock for accents

  • Foam tape, double-sided adhesive, and a bone folder

  • Embellishments: florals, sentiments, ribbons, etc.


✨ What Makes This Card So Special?

Unlike a traditional card, this clever slider adds interactive magic—your sentiment or design slides into view as the card is opened. It’s perfect for making your card recipients say “Wow!”

Great for:

  • Milestones

  • Anniversaries

  • Weddings

  • Congratulations or thank-you cards

  • Keepsake gifts with photos or messages


πŸ’‘ Time-Saving Tips I Share in the Video:

  • Pre-score your base pieces before assembly

  • Use removable adhesive to test placement before committing

  • Layer embellishments only after the slider mechanism is tested

  • Choose low-profile foam to keep the card flat and functional

  • Watch for alignment—small shifts can affect how smoothly it slides!


🎨 Design Ideas to Try:

  • Romantic floral themes with vintage tones

  • Baby shower slider reveal with a name or ultrasound pic

  • Graduation with kindergarten picture and senior picture

  • Add hidden journaling or a photo behind the slider


🌟 Final Thoughts

Interactive cards don’t have to be overwhelming. With a few helpful tips and the Anna Griffin Clever Sliding Card die, you can create gorgeous, moving designs without the frustration. Whether you’re new to card making or looking to expand your techniques, this tutorial simplifies the process while keeping the elegance Anna Griffin is known for.


πŸ‘‰ Ready to make your own? Watch the full tutorial here:  https://youtu.be/OynnHujU_tw?si=Zc_goYuASCQ4ZhUL

Don’t forget to like, comment, and subscribe for more creative tutorials! And if you give this card a try, tag me—I’d love to see how you make it your own. πŸ’Œ


Organize Craft Room Stamps & Die Cuts Simple Ideas


πŸ—‚️ Organize Craft Room Stamps & Die Cuts | Simple Ideas That Work!

Are your stamps and die cuts getting out of control? If you're spending more time searching through piles than crafting, it's time for a reset! In my latest YouTube video, I’m sharing simple, budget-friendly ideas to organize your craft room stamps and die cuts so you can find what you need—and actually enjoy your creative time.

These tips are easy to implement, don’t require expensive systems, and work in small or large spaces. Let’s bring peace to your paper crafting chaos!


πŸŽ₯ Watch the Full Organization Tutorial Here:


In this video, you’ll learn how to:

  • Sort and store clear stamps, cling stamps, and stamp sets

  • Use magnetic sheets and sleeves to tame your metal dies

  • Create a system by theme, brand, or project type

  • Choose storage that fits your space and your crafting style

  • Keep it simple, accessible, and pretty!


🧰 Supplies & Tools I Use:


  • Clear plastic storage pockets and decorative storage box

  • Label maker or printed tags

  • Binders with 8.5 x 11 sleeves (3 pockets)

  • Dividers and tabs to separate themes (holidays, sentiments, florals, etc.)

  • Adhesive backed round velcro 3/4 inch

  • 1 inch round punch


✂️ Stamp Storage Tips:

  • Clear stamp sets store perfectly in labeled plastic pockets

  • Add a white cardstock backing so you can see the stamps easily

  • Group stamps by category (e.g. holidays, background textures, sentiments)

  • Keep your most-used sets in a “go-to” bin on your desk


🧲 Die Cut Organization Made Easy:

  • Store metal dies on magnetic sheets inside clear pouches or binders

  • Use a labeling system to quickly identify dies by function or occasion

  • Keep nested dies together using magnetic boards or vent covers cut to size

  • For large die sets (like Anna Griffin), consider larger folders or bins


πŸ’‘ My Top Organizing Hacks:

  • Use inexpensive fridge bins or shoe boxes for compact shelf storage

  • Add tabs or flags to make flipping through your collection quick and easy

  • Create a catalog binder or swatch book to reference what you own without digging


🎯 Why This System Works:

  • Saves time during crafting

  • Reduces duplicates and forgotten supplies

  • Makes your stash visually inspiring

  • Keeps your space cleaner and more enjoyable


🌟 Final Thoughts

Organizing your craft room doesn’t have to be overwhelming. With a few simple tools and a little consistency, your stamps and die cuts can finally have a home that works for you—not against you.

πŸ‘‰ Watch the full video here: https://youtu.be/3LQFEbwMHxA?si=4LuF8BYMmC3KPxWB

Then let me know in the comments—what’s your biggest storage struggle? Or share your own clever solutions!

Happy crafting and happy organizing! πŸŽ¨πŸ—‚️


Adding HTV Heat Transfer Vinyl to Glass Porcelain Cricut Project

✨ Cricut Project: Adding HTV to Glass & Porcelain – Yes, It Works!

Have you ever wondered if you can use heat transfer vinyl (HTV) on surfaces other than fabric? Surprise! You absolutely can—and in my latest YouTube tutorial, I show you exactly how to add HTV to glass and porcelain using your Cricut machine.

This project is perfect for personalizing mugs, jars, candle holders, decorative plates, and more. With just a few tools and the right technique, you can turn everyday items into custom, professional-looking gifts or decor.


πŸŽ₯ Watch the Full Tutorial Here:


In the video, I guide you through:

  • Choosing the right HTV for non-porous surfaces

  • Prepping glass or porcelain for best adhesion

  • How to apply HTV with a heat source (including tips for using a heat press or heat gun)

  • Curing and caring for your finished piece


🧰 Supplies You’ll Need:

  • Cricut machine (Explore, Maker, or Joy)

  • Heat Transfer Vinyl (HTV) – I recommend HTVRont or Siser EasyWeed

  • Glass or porcelain surface (mug, jar, dish, etc.)

  • Heat-resistant tape (optional but helpful!) 

  • Heat gun

  • Scraping Tool

  • Rubbing alcohol and a lint-free cloth for prepping surface


πŸ”₯ Why HTV on Glass or Porcelain?


You might be thinking, “Isn’t adhesive vinyl better for hard surfaces?” And yes—adhesive vinyl is typically the go-to, but HTV has a few key benefits:

  • Cleaner finish with fewer air bubbles

  • Slightly more durable with proper application

  • Easier to weed intricate designs

  • Great for curved surfaces like mugs and vases

It takes a little heat and pressure, but once applied, HTV creates a sleek, almost painted-on look that feels premium.


πŸ’‘ Tips for a Successful Application:

  • Always clean the surface thoroughly with alcohol to remove oils

  • Use even heat—too hot or uneven, and the vinyl may peel

  • Let it cool before peeling the carrier sheet (cool peel!)

  • Avoid washing for 24–48 hours to let the adhesive fully set

  • Hand wash only—no dishwashers!


🎨 Personalize Anything:

  • Monogrammed mugs

  • Custom candle jars

  • Holiday decor

  • Bridesmaid proposal gifts

  • Labeling apothecary jars or spice containers

Once you master this trick, you’ll want to vinyl ALL the glass in your house!


πŸ“Œ Final Thoughts

This project is simple but so impactful—and it opens the door to endless creative possibilities. Whether you're making gifts or crafting for your own home, HTV on glass and porcelain adds that extra special touch with just a little heat and creativity.


πŸ‘‰ Watch the tutorial now and start creating: https://youtu.be/niq_aEDcJ2A?si=hZa_VWR_Fy2zue6S

If you try this project, be sure to tag me on social media or comment on the video. I’d love to see your creations and hear how it worked for you!


CRAFT ROOM EMBELLISHMENT & DIE STORAGE SIMPLE ORGANIZATION

🎨 Craft Room Embellishment & Die Storage: Simple Organization That Works!

If your craft room is overflowing with tiny embellishments and intricate metal dies, you’re not alone! Over time, our tools and supplies can become overwhelming—but organizing them doesn't have to be complicated or expensive. In my latest YouTube tutorial, I share my favorite simple organization solutions for keeping your embellishments and metal dies neat, visible, and easy to access.

Whether you're in a small crafting corner or a fully dedicated studio, these storage tips will help bring calm and creativity back to your space.


πŸŽ₯ Watch the Full Organization Tutorial Here:


In the video, I take you through my real craft room setup and show:

  • How I store embellishments by type and color

  • My go-to die storage system (and how to make it work for you!)

  • Affordable containers and supplies I use

  • Simple labeling and sorting tricks that save time

  • How to make your space functional and inspiring


🧁 Embellishment Storage: Keep the Pretty Things Pretty


Embellishments are the jewels of paper crafting—but they’re easy to lose or forget about. I show you how I organize mine using:

  • Container organizers and small stackable bins

  • Color-coded sorting (flowers, bling, sentiments, themed items)

  • Labeles for quick identification

  • A “grab-and-go” section for frequently used accents


✂️ Die Storage: Organize by Theme or Brand

Dies are an investment, and keeping them accessible and protected is a must. In the tutorial, I demonstrate:

  • How I use magnetic sheets in binder systems or folders

  • Options for plastic sleeves and labeling by collection or category

  • Ways to store large dies, shaped dies, and intricate sentiments

  • Tips to prevent bending or losing small pieces

Whether you’re using Anna Griffin dies, basic shapes, or specialty designs, you’ll find a method that works for your stash and your style.


🧰 Favorite Storage Products I Use:

  • Magnetic vent covers (cut to size for die storage!)

  • Clear photo storage boxes for embellishments

  • Binder pouches or pocket sleeves

  • Label maker or printable tags


πŸ’‘ Why This System Works:

  • Keeps everything visible but tidy

  • Encourages you to use what you have

  • Saves time during projects

  • Reduces duplicates and accidental re-purchases

  • Makes crafting more joyful and less chaotic!


🌟 Final Thoughts

Organizing your craft space doesn’t have to mean a total overhaul. With just a few affordable tools and a clear system, your embellishments and dies can finally have a home that works for you—not against you.

If you're tired of rummaging through bins or losing track of your favorite supplies, I hope this video gives you the boost and ideas you need to finally get organized!


πŸ‘‰ Watch the full tutorial here: https://youtu.be/G15WW5HLv4U?si=tJnWEUj-w0Hmt1Q7

What’s your biggest craft storage challenge? Let me know in the comments or tag me on social—I'd love to see your before-and-after transformations!


Anna Griffin New Pulley Card With Fairytale Scene Combo

🏰 Anna Griffin Pulley Card with Fairytale Scene Combo | Interactive Card Tutorial

If you’re ready to add a little magic to your papercrafting, you’re going to love this one! In my latest YouTube tutorial, I show you how to create a new pulley card design using Anna Griffin dies, complete with a whimsical fairytale scene combo that tells a story as it moves. ✨πŸ“œ

This project combines the elegance of Anna Griffin’s signature style with the charm of an interactive card—perfect for keepsakes, or any time you want to create a handmade card that truly wows.


πŸŽ₯ Watch the Full Tutorial on YouTube:

In the video, I walk you through step-by-step:

  • How to construct the pulley card base

  • How to layer your fairytale-themed elements

  • Tips for adding dimension, movement, and storytelling

  • My go-to supplies and tricks for a clean, professional finish


✨ What Makes This Pulley Card Magical?

Unlike a standard card, this one comes to life with a mechanism that reveals a hidden fairytale scene as you slide. Think castles, carriages, enchanted forests, or even a fairytale couple—whatever you dream up can be layered into the design.

It’s the perfect blend of:

  • Anna Griffin’s classic floral and ornate die-cutting style

  • Interactive paper engineering

  • A narrative moment that unfolds with movement


🧰 Supplies I Used:

  • Anna Griffin Pulley Card Die Set and Anna Griffin Fairy Scene Dies

  • Empress Die Cutting Machine

  • Fairytale-themed die cuts (castle, trees, characters, etc.)

  • Patterned and foil cardstock

  • Foam tape, strong adhesive

  • Embellishments like florals, glitter accents, and rhinestones


πŸ’‘ Pro Tips from the Tutorial:

  • Use lightweight foam layers to keep your mechanism smooth

  • Choose a color palette that matches your scene (e.g. soft pastels for a princess theme, dark tones for a villain twist)

  • Add a sentiment or quote reveal with the pulley action

  • Reinforce the pull tab with cardstock to avoid tearing


🏰 Creative Ideas for Fairytale Pulley Combos:

  • “Happily Ever After” wedding or anniversary card

  • Enchanted forest party surprise

  • Princess and dragon reveal scene

  • Fairytale villain mash-up (Maleficent, Evil Queen, etc.)


🌟 Final Thoughts

This Anna Griffin Pulley Card with Fairytale Scene is more than just a card—it’s a tiny, moving story in paper form. Whether you're crafting for someone special or just want to add a wow-worthy project to your portfolio, this card is a showstopper.

Make sure to like and subscribe on YouTube so you don’t miss any of my future tutorials, mash-ups, and interactive card ideas. I love pushing creative boundaries with die-cutting and storytelling, and this one was pure joy to make.


πŸ‘‰ Watch the full tutorial here: https://youtu.be/iOm6CICvWpk?si=9MLqwEQqpYK7fgcq

Tried this card yourself? Share your version with me on social or drop a comment below—I’d love to see your magical creations!


Anna Griffin Mirror Easel Card Reengineered As A Pulley Card

✨ Anna Griffin Mirror Easel Card Reengineered as a Pulley Card | Interactive Card Tutorial

If you love elegant cardmaking and interactive surprises, this one’s for you! In my latest YouTube tutorial, I take the Anna Griffin Mirror Easel Card Die Set and give it a totally fresh twist by reengineering it as a pulley card.

This project combines the classic beauty of Anna Griffin’s ornate die with a clever interactive mechanism that brings your design to life in a whole new way. Whether you're a seasoned paper crafter or just looking to try something new, this tutorial will walk you through how to transform a static easel card into a functional pulley card that will wow anyone who receives it!


🎬 Watch the Full Pulley Card Tutorial:

In this video, you’ll learn:

  • How to modify the Mirror Easel Card die-cut structure for movement

  • How to build and attach a working pulley mechanism

  • Tips for layering and reinforcing your interactive card

  • Ideas for embellishing your design with florals, foil, and more!


🧰 Supplies You’ll Need:

  • Anna Griffin Mirror Easel Card Die Set

  • Anna Griffin Empress Die Cutting Machine

  • Heavyweight cardstock

  • Foam tape and strong adhesive

  • Decorative embellishments (flowers, sentiments, jewels, etc.)


πŸͺ„ What Makes This Pulley Card Special?


The Mirror Easel Die is known for its elegance and intricate layers—but by turning it into a pulley card, you add movement and interaction to the already-beautiful structure. It’s perfect for:

  • Anniversaries

  • Special keepsake gifts

  • Any occasion that calls for a “WOW” moment

The movement of the pulley reveals a hidden sentiment, character, or image—so it’s as fun to use as it is to create.


πŸ”§ Reengineering Tips from the Tutorial:

  • Reinforce your pulley track with cardstock

  • Add stops or foam strips to control the range of movement

  • Match your embellishments to the revealed element for a cohesive look


πŸ’‘ Creative Ideas for Your Pulley Reveal:

  • A surprise sentiment or quote

  • A pop-up character or photo

  • A peekaboo window that uncovers a second sceneA layered image that moves upward as the pulley is pulled


🌟 Final Thoughts

This project was so much fun to create and gives a whole new life to an already stunning die set. I love combining classic beauty with interactive design, and the pulley mechanism brings a playful and unexpected twist that anyone can appreciate.

Whether you’re crafting for fun or creating a gift that will be cherished, this reimagined Mirror Easel Pulley Card is sure to impress.


Don’t forget to subscribe to my channel for more die-cutting tutorials, cardmaking hacks, and creative ways to use Anna Griffin dies in unexpected ways. And if you try this project, I’d LOVE to see it—tag me on social or share in the comments! πŸ’Œ

πŸ‘‰ https://youtu.be/VXxlPTFJ6yg?si=gAmnQfHeZZNiYPNU


πŸŽ‰ New FREE SVG Alert from Tinks Treasurez!

πŸŽ‰ New FREE SVG Alert from Tinks Treasurez! By Angie Koehne | Tinks Treasurez Hi crafty friends! πŸ’– I’m so excited to share something speci...